three.js で obj 形式モデルの使用
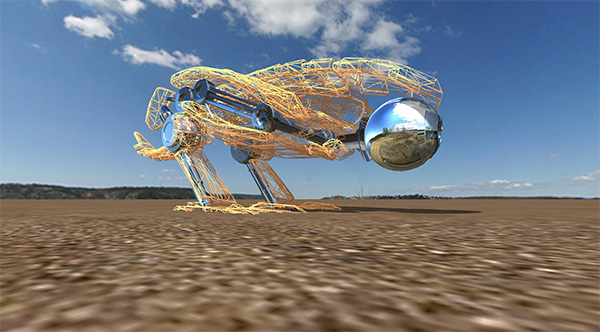
画像クリックでデモ画面が開きます。
3Dモデルのロードに少し時間がかかります。
前回の記事 では json 形式のモデルを読み込んでマテリアルを設定する方法のデモでしたが、今回は こちら から入手させていただいた Wavefront(obj) 形式のモデルを使用して同様のデモを作成してみました。
three.js の基本的な部分とマテリアルを作成してモデルに適用する部分は前回とほぼ同じですが、3Dモデル読み込みとモデルからの Mesh および マテリアルの選択部分が異なっています。
では、手順です。
obj形式のモデルの読み込み。
OBJMTLLoader で .obj と .mtl をロードする。
var loader = new THREE.OBJMTLLoader();
loader.load( "obj/Robot_BI.obj", "obj/Robot_BI.mtl", onLoad );
環境マップ用のテクスチャを読み込んでキューブ用テクスチャを作成。
var r = "cube_tex/";
cubeTexUrls = [ r + "posx.jpg", r + "negx.jpg", r + "posy.jpg", r + "negy.jpg", r + "posz.jpg", r + "negz.jpg" ];
var textureCube = THREE.ImageUtils.loadTextureCube( cubeTexUrls );
動的に変更するためのマテリアルを作成。
 // マテリアル(ガラス)
  glass = new THREE.MeshBasicMaterial( {
    color: 0x223344,
    envMap: textureCube,
    opacity: 0.1,
    combine: THREE.MixOperation,
    reflectivity: 0.7,
    transparent: true
  } )

  // ロボの本体色変更用マテリアル
  bodyMaterials =
  {
    Red: new THREE.MeshLambertMaterial( {
      color: 0x660000,
      envMap: textureCube,
      combine: THREE.MixOperation,
      reflectivity: 0.5
    } ),
    Blue: new THREE.MeshLambertMaterial( {
      color: 0x224466,
      envMap: textureCube,
      combine: THREE.MixOperation,
      reflectivity: 0.3,
      side: THREE.DoubleSide
    } ),
    Black: new THREE.MeshLambertMaterial( {
      color: 0x000000,
      envMap: textureCube,
      combine: THREE.MixOperation,
      reflectivity: 0.5
    } ),
    White: new THREE.MeshLambertMaterial( {
      color: 0xffffff,
      envMap: textureCube,
      combine: THREE.MixOperation,
      reflectivity: 0.5
    } ),
    Scorpion: new THREE.MeshPhongMaterial( {
      color: 0x770000,
      specular: 0xffaaaa,
      envMap: textureCube,
      combine: THREE.MultiplyOperation
    } ),
    Gold: new THREE.MeshPhongMaterial( {
      color: 0xaa9944,
      specular: 0xbbaa99,
      shininess: 50,
      envMap: textureCube,
      combine: THREE.MultiplyOperation
    } ),
    Chrome: new THREE.MeshPhongMaterial( {
      color: 0xffffff,
      specular:0xffffff,
      envMap: textureCube,
      combine: THREE.MultiplyOperation
    } ),
    Wire: new THREE.MeshPhongMaterial( {
      color: 0xffaa66,
      wireframe: true
    } )
  };
DirectionalLight の castShadow を有効にしてパラメータを設定。
パラメータは下記コードのコメントが設定内容と思われますがよくわかっていません…
var directionalLight = new THREE.DirectionalLight( 0x999999 );
directionalLight.position.set( -1.5, 2, -0.5 ).normalize();
directionalLight.castShadow = true;
directionalLight.shadowCameraVisible = true; // 確認用四角錐
directionalLight.shadowMapWidth = 1024; // 影テクスチャの幅
directionalLight.shadowMapHeight = 1024; // 影テクスチャの高さ
var d = 50; // dist 大きければ広範囲・小さい蹴れば狭範囲
directionalLight.shadowCameraLeft = -d;
directionalLight.shadowCameraRight = d;
directionalLight.shadowCameraTop = d;
directionalLight.shadowCameraBottom = -d;
directionalLight.shadowCameraNear = -30; // 四角錐の上面の位置
directionalLight.shadowCameraFar = 20; // 四角錐の下面の位置
directionalLight.shadowCameraFov = 40; // 視野角
directionalLight.shadowBias = 0.0001; // ?
directionalLight.shadowDarkness = 0.5; // 影の濃さ
scene.add( directionalLight );
WebGLRenderer の shadowMapEnabled を有効にする。
renderer.shadowMapEnabled = true;
モデルは Object3D として読み込まれるので、Object3D に内包されている Mesh と Mesh に使用されているマテリアルを見つけて作成したマテリアルを適用。
Mesh の castShadow と receiveShadow を有効にして(地面だけではなくオブジェクト本体にも)影が落ちるように設定。
マテリアル変更可能な Mesh はグローバル変数で参照しておく。
 var scale = 5;
  object.scale.x = object.scale.y = object.scale.z = scale;

  for(var i = 0; i < object.children.length; i++)
  {
    var obj = object.children[i];
    var l = object.children[i].children.length;
    for(var j = 0; j < l; j++)
    {
      var mesh = obj.children[j];
      mesh.receiveShadow = true;
      mesh.castShadow = true;
      if(mesh.material.name == "lensglass")
      {
        mesh.material = glass;
      }
      else if (mesh.material.name == "shinymetal") {
        mesh.material = bodyMaterials.Chrome;
      }
      else
      {
        // 色を変更する Mesh
        if(mesh.material.name == "colmetal")
        {
          bodyMesh = mesh;
          bodyMesh.material = bodyMaterials.Red;
        }
      }
    }
  }
  scene.add( object );
背景と地面の作成。
背景は環境マップ用のキューブテクスチャを使用した skybox、地面は Plane にテクスチャを貼り付けただけです。
地面には影が落ちるため receiveShadow を有効に。
 // skybox
  var size = (maxDist * 100)/2;
  var skyGeometry = new THREE.CubeGeometry( size, size, size );
  var materialArray = [];
  for (var i = 0; i < 6; i++)
  {
    var mat = new THREE.MeshBasicMaterial({ map: THREE.ImageUtils.loadTexture( cubeTexUrls[i] ), side: THREE.BackSide });
    materialArray.push( mat );
  }
  var skyMaterial = new THREE.MeshFaceMaterial( materialArray );
  var skyBox = new THREE.Mesh( skyGeometry, skyMaterial );
  skyBox.receiveShadow = true;
  skyBox.rotation.y = 180;
  scene.add( skyBox );

  // ground
  var planeGeo = new THREE.PlaneGeometry(size, size);
  var texture = THREE.ImageUtils.loadTexture( "tex/ground.jpg", null, onLoadGround )
  texture.wrapS = THREE.RepeatWrapping;
  texture.wrapT = THREE.RepeatWrapping;
  texture.repeat.set( 64, 48 );
  var mat = new THREE.MeshLambertMaterial({map:texture});
  var plane = new THREE.Mesh( planeGeo, mat );
  plane.rotation.x = - Math.PI / 2
  plane.position.y = -2;
  plane.receiveShadow = true;
  scene.add( plane );
ボタンを作成しクリックで Mesh.Material を変更できるようにする。
 var buttons = document.getElementById( "buttons" );
  for ( var key in materials )
  {
    var button = document.createElement( 'button' );
    button.textContent = key;
    // マテリアルの切り替え
    button.addEventListener( 'click', function ( event ) {
      bodyMesh.material = materials[ this.textContent ];
    }, false );
    buttons.appendChild( button );
  }
読み込みから表示までの一連の手順は以上のような感じです。
それにしても動作が重いのがなんともかんとも…